For this demonstration, Joe used a forty year old Japanese black pine that had once been part of a group setting planted on a slab. He chose this tree as it had character and good ramification with which to work and manipulate. Joe then walked us through how he styles such a tree.
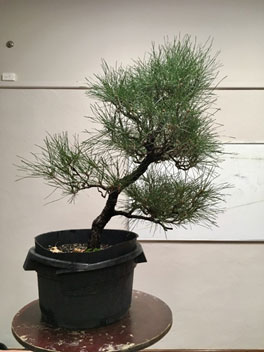 Joe works through what he called ‘a process’ before he begins styling. He looks at the choices and what is interesting about the tree. In this case there were two choices- short and squat or long and slender with the trunk as a feature. As the trunk, with its old flaky bark and elegant line, was this tree’s most interesting feature the choice was made.
Joe always starts with basic maintenance, the ‘doing something’ of his process. He starts with a rough prune, beginning in the mid-zone of the tree, cutting out any dead branches and pruning back to two branches, reducing the tree by about a third and letting the light in. While doing this, he considers direction, balance and reverse taper..
Pruning is a tool for balancing the tree and Joe always thinks about balance when pruning. With pines, he keeps stronger branches in weak zones and weaker branches in strong zones. Joe plucks needles to around seven pairs to balance the growth. Shoots that have more needles get more energy and therefore grow more strongly, out-competing weaker branches. By leaving the same amount of needles, the energy is balanced. What can’t be used has been removed and the tree has been made much lighter and Joe has a much better knowledge of the tree.
If jins are required, they are taken into account at this stage. As this is to be a graceful, elegant tree, Joe kept the jins simple and short cutting the lower branches, so the eye doesn’t move away from the tree’s best feature, its trunk.
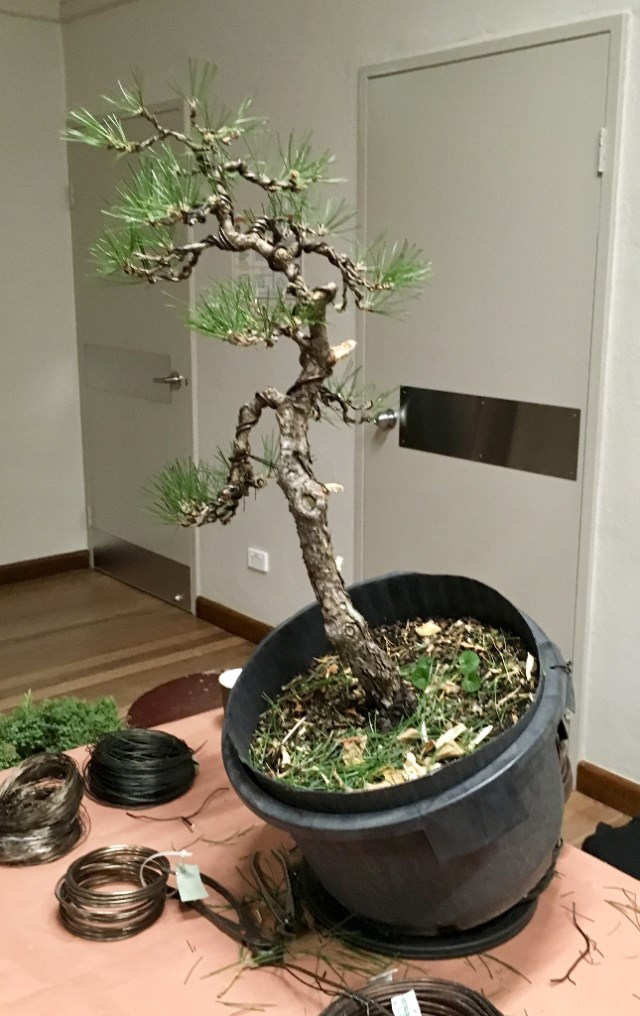
The next phase for Joe is wiring which he enjoys for its meditative quality and the fact that it is the only thing that brings change to a tree in a relatively short time. He uses copper wire on pines and aluminium on deciduous trees.
The crux of wiring is a 35-50° angle and once this is mastered it comes down to transitioning the weight of the wire so it is light enough but strong enough for each branch. Using one piece of wire for two branches allows for a transitioning point for different thicknesses. Start at the trunk with the thickest wire using a 45° angle from the soil and double up for one and a half turns and then continue at 35-50°. Identify where the change in wire size is needed and find a junction where the wire can be stepped down in size. Try not to cross your wires (as this creates more pressure at that point and the wires may start to cut in and cause damage) but if you have to, do it on the bottom of a branch, where it can’t be seen. It is better to cross smaller wires than larger ones if you have to. Finish the wire by making a hook that turns back on itself so the branch stays wired in all conditions.
 When setting the branches, Joe’s aim is to have them ‘peel off’ in a smooth way, rather like a highway with an off ramp, keeping the flow smooth. Always support the branch by holding the last wired point as you go to achieve a better end result and less damage. Joe’s wiring tip for heavier branches is to bend the branch and then wire. There is still capacity in the wire but 20% of the bend is done.
Pads shouldn’t be flat. Work the foliage from multiple angles- front, above etc but always remember to have the branch tip facing upwards as it would in nature.
Having completed the ’process’, Joe is very familiar with the tree and begins the styling. As the first branch is the heaviest, Joe removed the fifth branch as it was as heavy as the first and on the same level as the back branch. The branch above was brought down to fill the now empty space. (Always make sure this branch will bend into the space first.) The apex is the trickiest part as it is a body of foliage rather than a particular point and so should have multiple branches. The challenge is to get a full apex with a front and back and so it is necessary to leave more growth than you may think (if available).
Joe arranged the apex twice. First, he created a perfect apex from the front but pointed out that this was cheating for a photogenic end result to a demonstration and unfair to the tree’s owner who should end up with a tree that is styled for future development. So he rearranged the apex, setting the branches for the future.
The final result..
Next month, Joe on pine maintenance.