Last month, Clinton Nesci was our demonstrator and his topic was forests. He brought two old settings, one a liquidambar group of seven trees and the other a large Japanese maple forest of eight trees. Both needed repotting and restyling. While forests are fun for all skill levels, Clinton believes they are trickier than most people think as tree sizes, species and positioning all have to be considered and executed well for a forest to be successful.
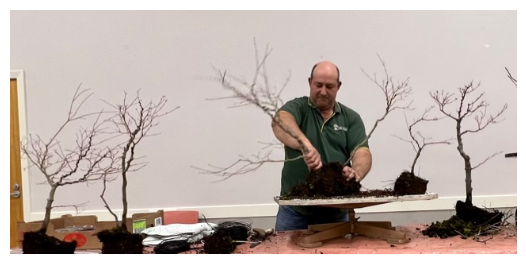
Clinton began by discussing how this liquidambar forest could be improved.

Clinton pointed out the shortcomings of this setting and discussed ways to solve them. The first issue for this forest was that one of the liquidambars was dead. Clinton would only keep five trees replanting them closely and leaving open space on the right-hand side. However, an alternative to this would be to remove the dead tree and add a couple of small liquidambars (making sure they are the same variety) to bring the total back to seven. This could also be achieved by allowing suckers to develop, creating new little trees.
Another flaw was the trunk sizes; while reasonable, they were all about the same. Ideally, there should be a range with the main tree having the largest trunk. To overcome this, Clinton suggested trying to find a larger tree (taking care that it is the same as the others) and putting it in or removing one tree and growing it on in a black pot until it reaches the desired size. Although time consuming both solutions would solve the problem. Also, the back trees needed irregularity to create depth which is lacking.
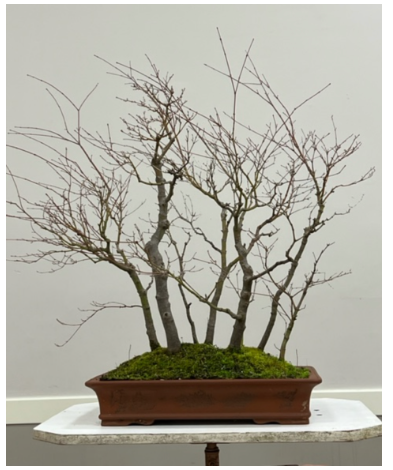
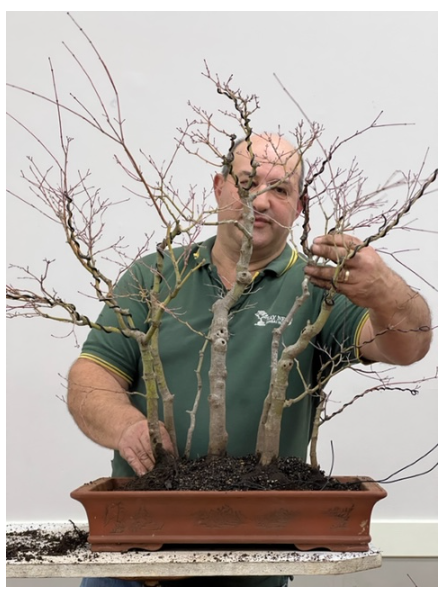
Once, branches filled the expansive space of this old forest and the job to be done here, was to bring the trees in to fill the space around the main trunk. This was a remodelling job, not a repot. Clinton wanted to see the trees closer with more irregularity in their alignment.
As there were eight maples, one had to go. Tree 1 and tree 2 were parallel, so one or the other needs to be moved slightly forward and tree 2 needs to be turned. Trunk movement is important so Clinton will work this out as he goes.
To start, Clinton removed all the dead branches and cut back elongated growth. He wired the main branches before removing the group from the pot. Clinton then secured tie-down wires in the pot in readiness for repotting. After that, the root ball was cut.
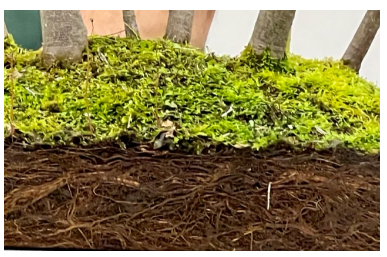
This forest hadn’t been repotted for 4-5 years and even though the roots were congested, there wasn’t much in the way of large roots.
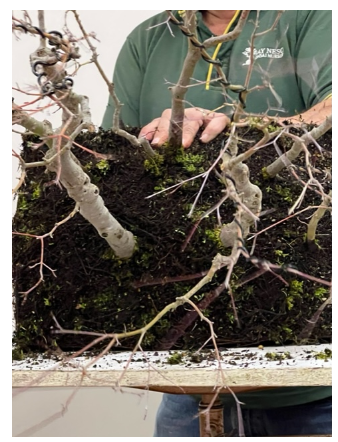
The aim was to make a tighter design around the main tree because it didn’t have a lot of branches. Clinton used a root saw to reduce the root ball and separate the trees. It took some time and effort!
Even though the original pot was too too deep, the forest was put back into it and will stay there for a year or so, to promote vigorous growth. Clinton sees a thinner, more feminine pot of a lighter colour as a better choice in the future.

Clinton placed the main trees but found he still needed to remove more roots to get them closer together, so he reduced them into smaller wedges and worked them together.
Clinton will wire the finer branches and bend the branches to arch out and fill the space at home. The forest will be placed in a sunny spot and watered with Seasol to promote new root growth.
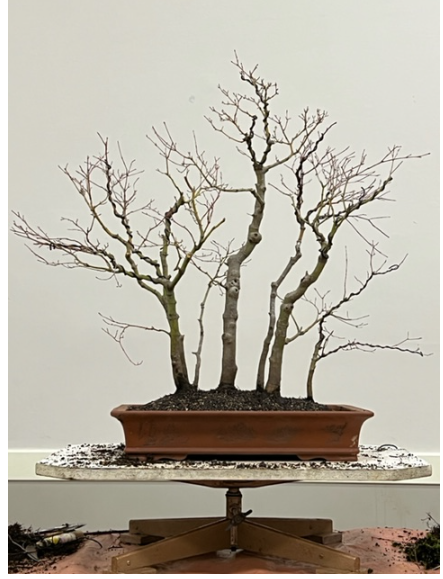
Clinton created a natural-looking forest, a true sign of success, with a lovely flow and movement.
Thanks Clinton for sharing your expertise.